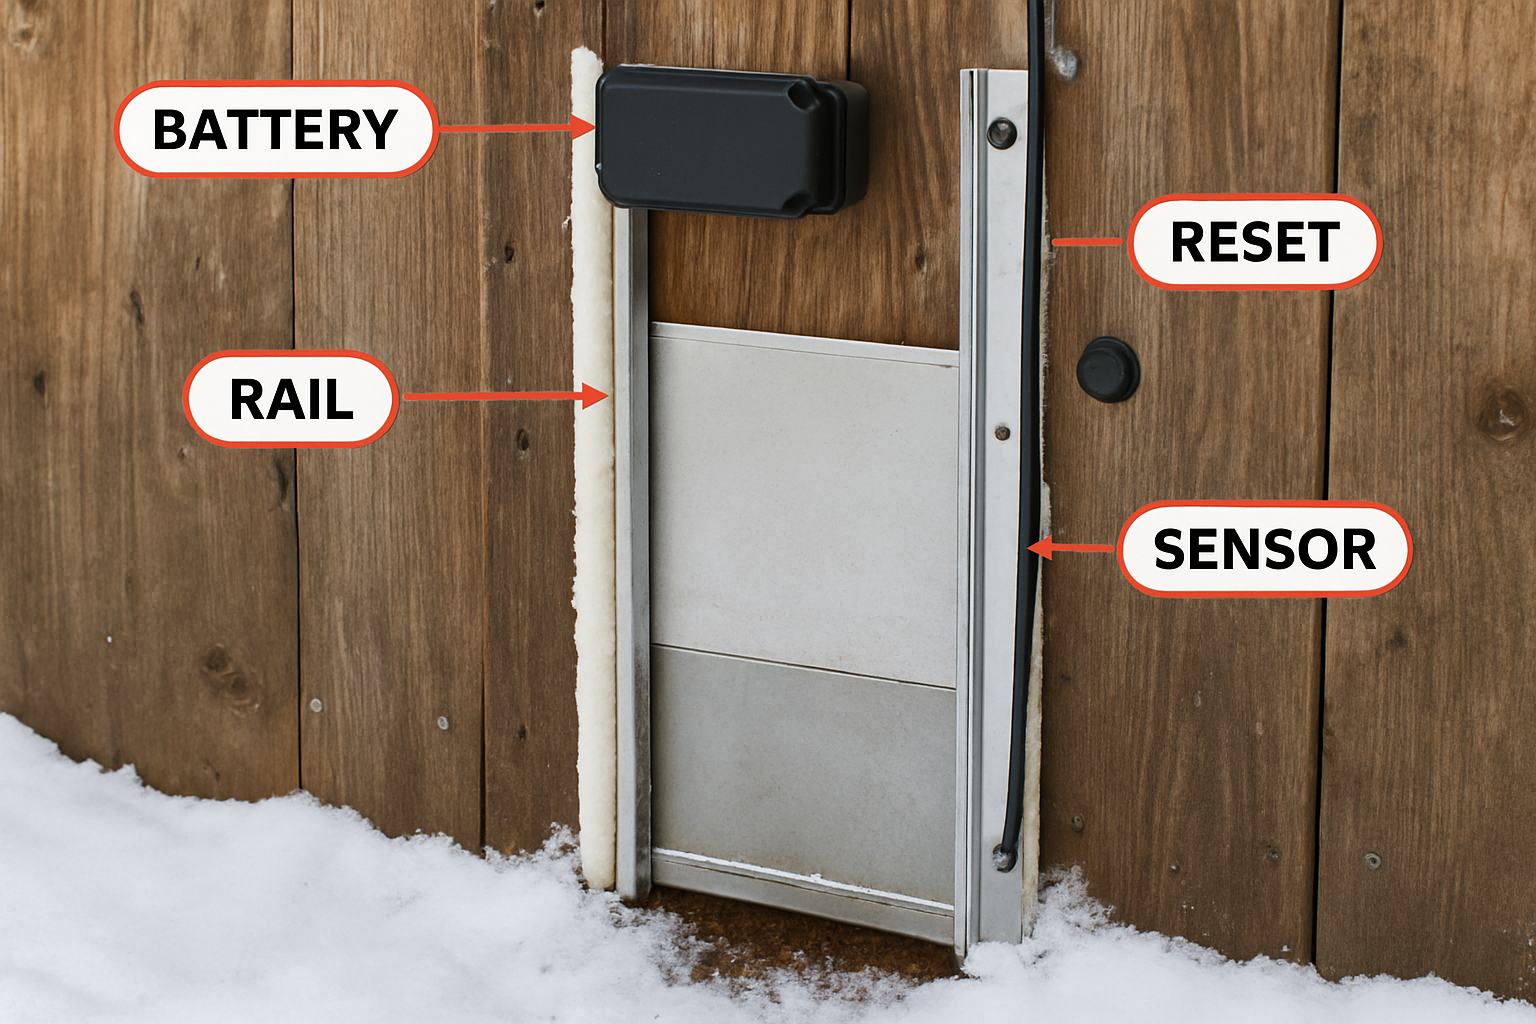
To insulate an automatic coop door frame effectively, seal the perimeter with closed-cell foam or exterior-grade silicone caulk, ensuring no insulation enters the vertical runner tracks. This prevents motor jams and maintains mechanical clearance. Use heavy-duty brush seals or flexible rubber draft shields to cover air gaps without obstructing the door's movement.
Technical Specification Snapshot
| Insulation Metric | Standard Framing Practice | Automated Door Frame Practice |
|---|---|---|
| Primary Sealant Type | Expanding polyurethane spray foam | Exterior-grade, neutral-cure silicone caulk |
| Draft Protection Medium | Adhesive foam tape or vinyl V-strips | High-density nylon brush sweeps / rubber flaps |
| Frame Torque Margin | High tolerance for minor warping | Zero tolerance; over-tightening warps aluminum tracks |
| Thermal Bridging Risk | Minimal through wood framing | High through metal frames (requires external backing) |
| Permitted Track Clearance | Not applicable | Minimum 1.5mm free-play along all sliding edges |
Failure Physics & Mechanical Nuance
Automatic coop doors rely on precise mechanical tolerances. Insulating materials like spray foam or thick weather stripping inside the tracks increase kinetic friction, leading to motor stalls. Expanding polyurethane foams exert up to 40 PSI of curing pressure, which can easily bow aluminum channels inward.
Additionally, the physics of thermal expansion and contraction can warp metal frames if they are screwed too tightly onto uneven wooden siding. When winter temperatures drop, the differential contraction rates between aluminum frames and wet wood siding exacerbate structural pinching, increasing the motor's amperage draw until the safety firmware shuts down the system.
Insulation and Thermal Bridging
Metal frames are prone to thermal bridging, where heat transfers rapidly through the conductive metal housing, bypassing the surrounding wooden insulation. This causes the interior face of the metal frame to become significantly colder than the ambient coop air.
When warm, humid air from flock respiration and deep-litter bedding contacts this cold metal surface, it condenses into moisture. In sub-zero weather, this condensation can freeze into micro-ice crystals inside the guide tracks, effectively gluing the door panel to the rails. Applying an external closed-cell foam backing behind the frame minimizes this thermal bridge, keeping the metal chassis above the dew point.
Step-by-Step Field Procedure
- Prepare the Structural Frame:
- Clean the coop wall and frame's perimeter with rubbing alcohol to remove organic coop dust, chicken dander, and loose wood splinters. This ensures proper adhesion of your weather-sealing elements.
- Apply Non-Expanding Silicone Caulk:
- Lay a continuous 1/4-inch bead of neutral-cure silicone caulk along the top and side exterior mounting flanges where the frame meets the wood siding. Leave the bottom sill open so trapped internal moisture can weep out.
- Install High-Density Brush Seals:
- Mount high-density nylon brush sweeps to the wooden casing directly adjacent to the door opening. Adjust the bristles so they skim the flat face of the sliding panel with an overlap not exceeding 2 mm.
- Check Track Clearance Margins:
- Manually run the door panel through its full range of travel. Use a feeler gauge or caliper to verify a minimum of 1.5 mm of unrestricted free-play along both vertical rails.
Technical Limitations & Triage
Automatic coop doors have zero tolerance for added friction within the tracks. Insulating materials that encroach on these areas can cause motor stalls and safety errors. Metal frames are susceptible to thermal bridging, necessitating external insulation solutions to maintain energy efficiency without compromising door function.
Carefully select your materials based on the chemical environment of a coop. High ammonia levels from chicken droppings will rapidly degrade standard latex caulks and cheap open-cell foam tapes, turning them brittle within a single season.
Sub-Zero Reset Protocol
In extremely cold conditions, automatic doors may require a reset to ensure smooth operation. If the door stalls:
- Power Deprivation: Remove the batteries or disconnect the DC power source for 60 seconds to clear the control board's calibration memory.
- De-Icing: Inspect the tracks for ice buildup. Gently remove obstructions using a plastic scraper. Never use metal tools, which can score the aluminum tracks and create permanent friction points.
- Dry Lubrication: Apply a thin layer of dry graphite spray or silicone-based lubricant to maintain smooth movement without freezing. Avoid petroleum-based lubricants like WD-40, which thicken in the cold and collect feathers.
- Recalibration: Power the unit back on and initiate a manual open/close cycle to allow the internal current sensor to relearn its baseline amperage thresholds.
Field Failure Triage Checklist
- Check Mechanical Clearance: Verify that there is a minimum of 1.5mm free-play along all sliding edges. If the door binds, check if the mounting screws were over-torqued, causing the frame to warp.
- Inspect Sealant and Draft Protection: Confirm that silicone caulk and brush seals are applied correctly, avoiding track interference. Ensure expanding foam has not bled into the slider tracks from behind the wall.
- Evaluate Thermal Bridging: Check for external closed-cell backing to mitigate thermal bridging in metal frames. Adjust frame alignment if structural shifting or seasonal wood swelling is detected.
Final Tactical Recommendation
For optimal insulation of an automatic coop door frame, focus on sealing the perimeter with silicone caulk and using brush seals for draft protection. Avoid placing insulation within the tracks to prevent mechanical interference. Regular maintenance and seasonal inspection before the first frost will ensure long-term functionality and energy efficiency.